Aerial image segmentation
Learn how to execute a real-world workflow that performs AI-based semantic segmentation of aerial images.
This tutorial assumes that you’ve already installed Steep and that you know how to submit a workflow.
What we are going to do
In this tutorial, we will apply a tiling service and a segmentation service to an aerial image. The segmentation service is based on segment-geospatial, which in turn uses Facebook’s Segment Anything AI model. Both services are provided as pre-built Docker images on GitHub.
Semantic segmentation is the process of assigning an object class (e.g. tree, building, or street) to each pixel of an image. Our workflow creates segmentation masks, which are images where the detected classes are represented by different colors.
The workflow consists of two steps:
The tiling service splits the input image into four smaller tiles.
The segmentation service is applied in a for-each action to each image tile to create the segmentation masks.
The actions in the second workflow step are intended to run in parallel. If you’ve just installed Steep, you will most likely want to enable parallelization.
Note that each instance of the segmentation service requires up 6 GB of RAM. If you wish to run the workflow on a single machine only, limit the number of agents so that you don’t exceed your main memory.
Why tile the image?
You might wonder why the input image needs to be tiled and why we don’t apply the segmentation to it directly. There are three reasons for that:
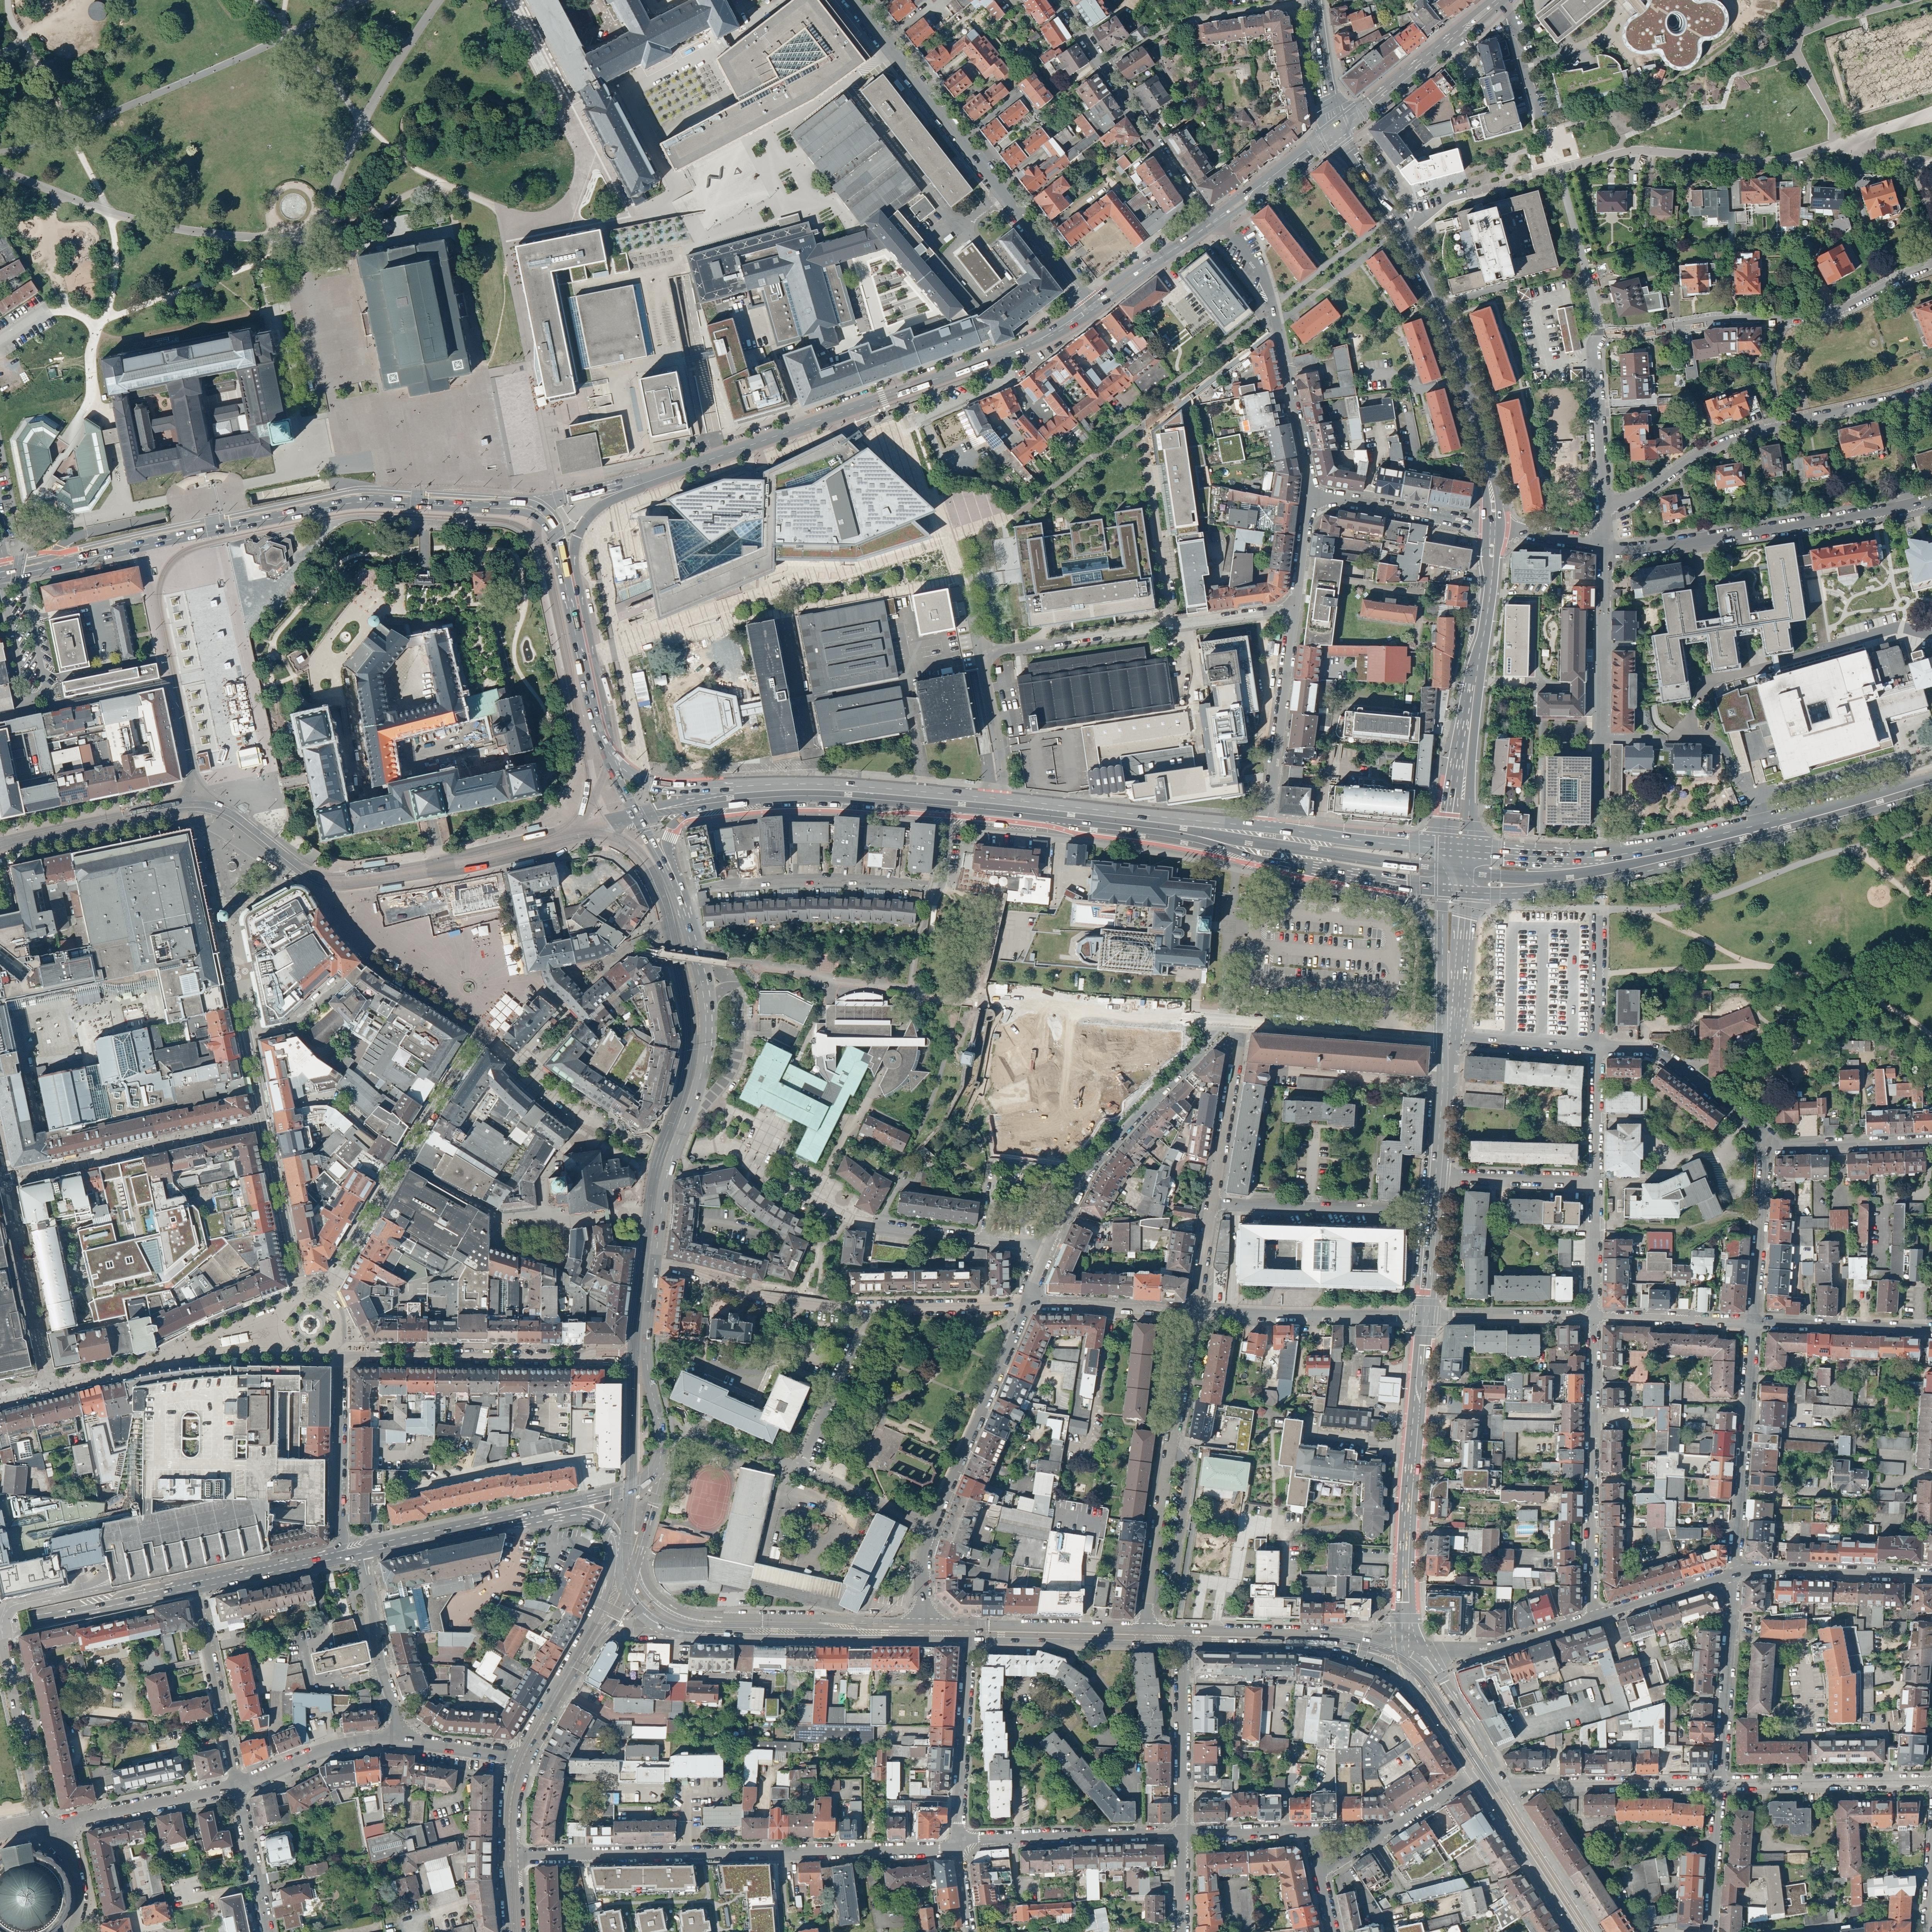
- Quality. Aerial images typically have a high resolution (e.g. 5000x5000 pixels, like the one below), and AI models tend to perform badly on large images. Consider the following pictures where we applied the segmentation on an input image directly and then executed the workflow with the same image but with 2×2 tiles and 5×5 tiles. The smaller the tiles, the more precise the results are and the more objects the model is able to identify.
-
Lower memory consumption. The smaller the tiles are, the less memory each segmentation process needs. This is particularly important if you enable parallelization and run multiple processes on the same machine. Also, if you enable GPU acceleration, depending on your hardware, your graphics card memory might not be large enough to process a high-resolution image and the segmentation service will crash.
-
For the sake of demonstration. With this tutorial, we aim to teach you how to use a for-each action to process the results of a service with another service in parallel.
Image tiling will result in a higher quality, but it also has an impact on performance. The more tiles you create, the longer the workflow will take.
Step 1: Download input data
The most important thing for any data processing workflow is the data. In this tutorial, we use an aerial image provided by the Hessische Verwaltung für Bodenmanagement und Geoinformation in Germany through https://gds.hessen.de. The image is free and can be used for any purpose.
Use the following link to download the full resolution image:
In the following, we assume that the image has been saved to:
/data/dop20_32_475_5524_1_he.jpg
If you’ve downloaded the image to another location on your computer, make sure you modify the paths in the subsequent steps.
Step 2: Add service metadata
Similar to the previous tutorials, we need to add metadata for the tiling service and the segmentation service. Open the file conf/services/services.yaml and add the following code to it to describe the tiling service:
The service has three parameters: one for the input image file, one for the output directory where the tiles will be stored, and one specifying the number of columns and rows to split the image into. Regarding the latter, a value of 5 means the image will be split into 5×5 (=25) tiles.
As the service is provided as a pre-compiled Docker image on GitHub, we set the attribute path to the Docker image name and the attribute runtime to docker.
Now, add the metadata for the segmentation service:
The service has just two parameters: one for the image to segment and one for the filename of the output segmentation mask. We set the fileSuffix of the output parameter to .jpg to make sure the filename will be generated with the right extension.
Again, we use the Docker image name as path and set the runtime to docker.
Step 3: Configure Steep
Our two services will be executed in Docker containers, which have a virtualized file system. Any data location on the host system that should be accessible from within a Docker container needs to be mounted when the container is started.
In our case, this applies to the /data directory where the input image has been downloaded. We will use the same directory for Steep’s temporary path as well as its output path to access the segmentation masks after the workflow has finished.
Change temporary path and output path
Open Steep’s main configuration file conf/steep.yaml and modify the properties tmpPath and outPath as follows:
Mount data directory
In the same file, add the following configuration to tell the Docker runtime to mount the /data directory into every container started:
Restart Steep
Restart Steep if it is running, so it can pick up the updated configuration.
Step 4: Create the workflow
Create a new file segment.yaml and paste the following workflow into it:
The workflow first applies the tiling service tile to the input image. The service writes its results into a directory. The segmentation service segment is then applied in a for-each action to each image tile in this directory. Steep will create a new process chain for each image tile and execute them in parallel if possible.
Step 5: Submit the workflow
Run the following command to submit the segmentation workflow to Steep:
You can monitor the workflow execution in Steep’s web UI. Note that it will take several minutes to complete.
Also, if you haven’t done so already, the Docker images need to be pulled first. They have a total download size of about 8 GB, so depending on your Internet connection, downloading also may take a few minutes. Subsequent runs will be faster.
After the execution has finished, you will find the segmentation masks at /data/out/[WORKFLOW ID].
Optional: Enable GPU acceleration
If your machine has an NVIDIA graphics card, you can optionally enable GPU acceleration to tremendously speed up processing. In fact, this is recommended for any AI workflow in production.
For this, the NVIDIA Container Toolkit needs to be installed on your system. Follow the installation guide if you haven’t done so already.
Modify the metadata of the segmentation service and add the following runtime argument:
This will tell Steep to pass the argument --gpus all to the docker run command when it starts the segmentation service.
Important: A single GPU cannot be shared between multiple instances of the segmentation service. If you want to use GPU acceleration, you have to either disable parallelization or run multiple instances of Steep distributed across several machines.